Table of Contents
Creating an Account with CloudFlare
- Flux Cloud domain manager system uses CloudFlare CNAME flattening to point your WordPress URL to your own domain. To get started, you will need a CloudFlare account(it’s free).
- Once you create your account, you’ll be asked to ‘Add a Site’ to CloudFlare.Enter your domain name and CloudFlare will automatically pull your DNS settings from your current domain name provider to CloudFlare. Double check all DNS entries have been pulled across.
- After you’ve added a site, you’ll be issued name servers by CloudFlare to change over at your Domain Name Registrar.
- Once the settings have taken effect, it will take a couple minutes to a few hours for your custom domain name will be passed through CloudFlare’s system forwarding to your original host.
Next is to point your Flux Cloud generated WordPress site auto-domain to your own.
Pointing a Domain without WWW
If you prefer your domain without the www(ie. https://yourwebsite.com), here’s the instructions:
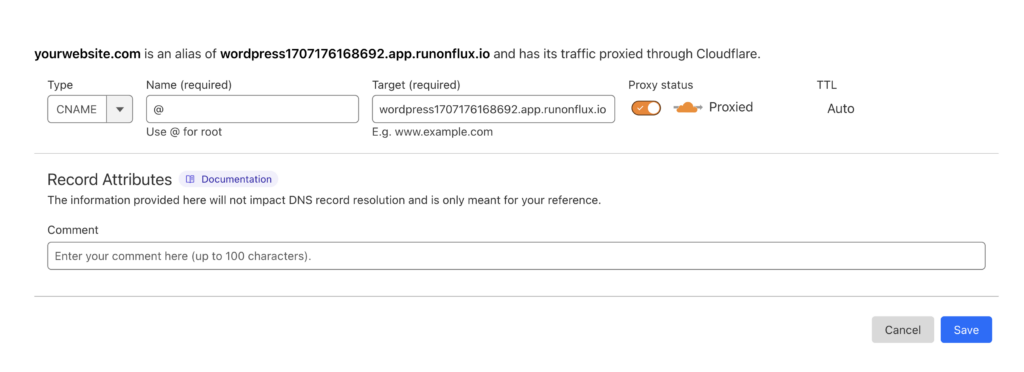
For the CNAME flattening of your domain to work properly, please make sure the proxy status is checked on.
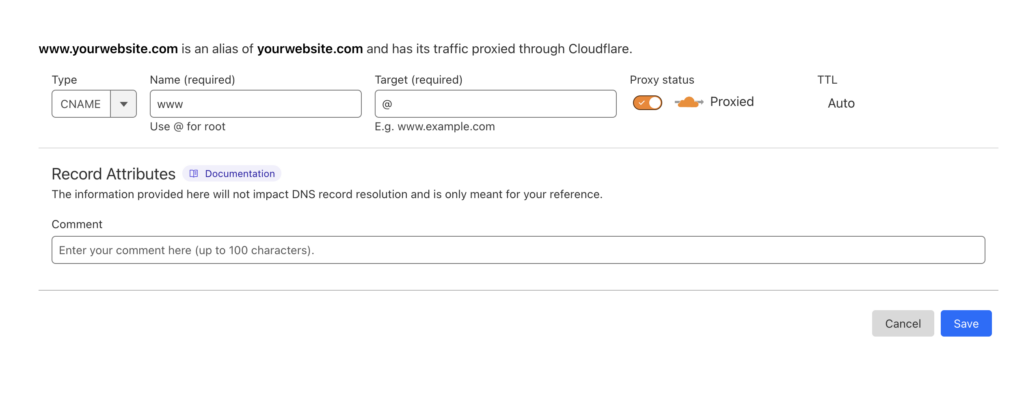
Adding the WWW Record
If you like to add the www record to your domain, simply add another CNAME record with www, pointing to root domain.
Resolving SSL Issues (Too Many Redirects)
After your domain pointing is complete, there’s a chance you might get “too many redirects” issue.

The issue mostly occurs due to “Flexible” SSL Setting in CloudFlare for your domain. The fix is rather easy.
In your CloudFlare domain, head over to SSL/TLS settings and make sure the encryption option is set to Full.

Once you save, your domain should be correctly pointed to your FluxRunner WordPress website.